
Ice Dye DIY

Tie Dye is a huge trend this summer, so instead of going to Target and grabbing one of those basic ones off the shelf, why don’t you make one yourself? Want to make it even easier? Let’s ice dye! The weather is getting warmer and this is a perfect activity during those hot months. As an added bonus, you get really cool watercolor effects when doing ice dying.
This dying technique uses cold water powder dyes to create bright colors on your clothing. I’ve read that using liquid dyes or powder dyes like Rit won’t work. Those types of dyes rely on heat to set the color.
The hardest part of this DIY is waiting…lol. If you’re doing it outside during a day above 80 degrees then you’ll be cherry!
TLDR:
Soak in soda ash water
Cover in ice and sprinkle with pigment
Ice melts, rinse, and wring out
Wash
Wear
Tutorials online always tell you to wash your clothes before dying. This will help remove any detergents or fabric softeners and will help the colors set better. Well….I didn’t do that. Hahah…I don’t have in-unit laundry so I’m not lugging my 2 pieces of clothing to wash at the laundromat. Especially not during SIP…people are nasty lol.
It don’t think it made a difference. My clothes were clean from the last time I washed them (with fabric softeners) and the colors looked great! So feel free to skip this step. I dyed 2 tanks, a polo, and a hoodie. This is also a great way to give old clothes a new life. I haven’t worn my white hoodie in so long, and it was some Forever21 purchase from a few years ago.
OK, let’s get started! (I’ll be using a variety of photos from each time I dyed something)
I took 1 gallon of water and added it to my wash bin with 1 1/2 cups of soda ash. Use rubber gloves and mix the powder with your hands as it tends to clump on the bottom. Dunk your piece of clothing and soak for 15-20 min.


Remove your item from the soda/water solution and wring out as much water as you can.


Now lay your piece of clothing over the wire rack. There’s no right way to do this…but try to clump and twist your fabric so some spots won’t be touched by the pigments. Don’t squish the fabric too tightly or the colors might meld together and look flat. We’re trying to achieve some cool watercolor effects. We want high and low color variations.


Now take some ice and throw it in a blender and crush. You don’t want it to be powdery snow, so only pulse it 5-6 times. You want an icy snow cone consistency. Set aside.
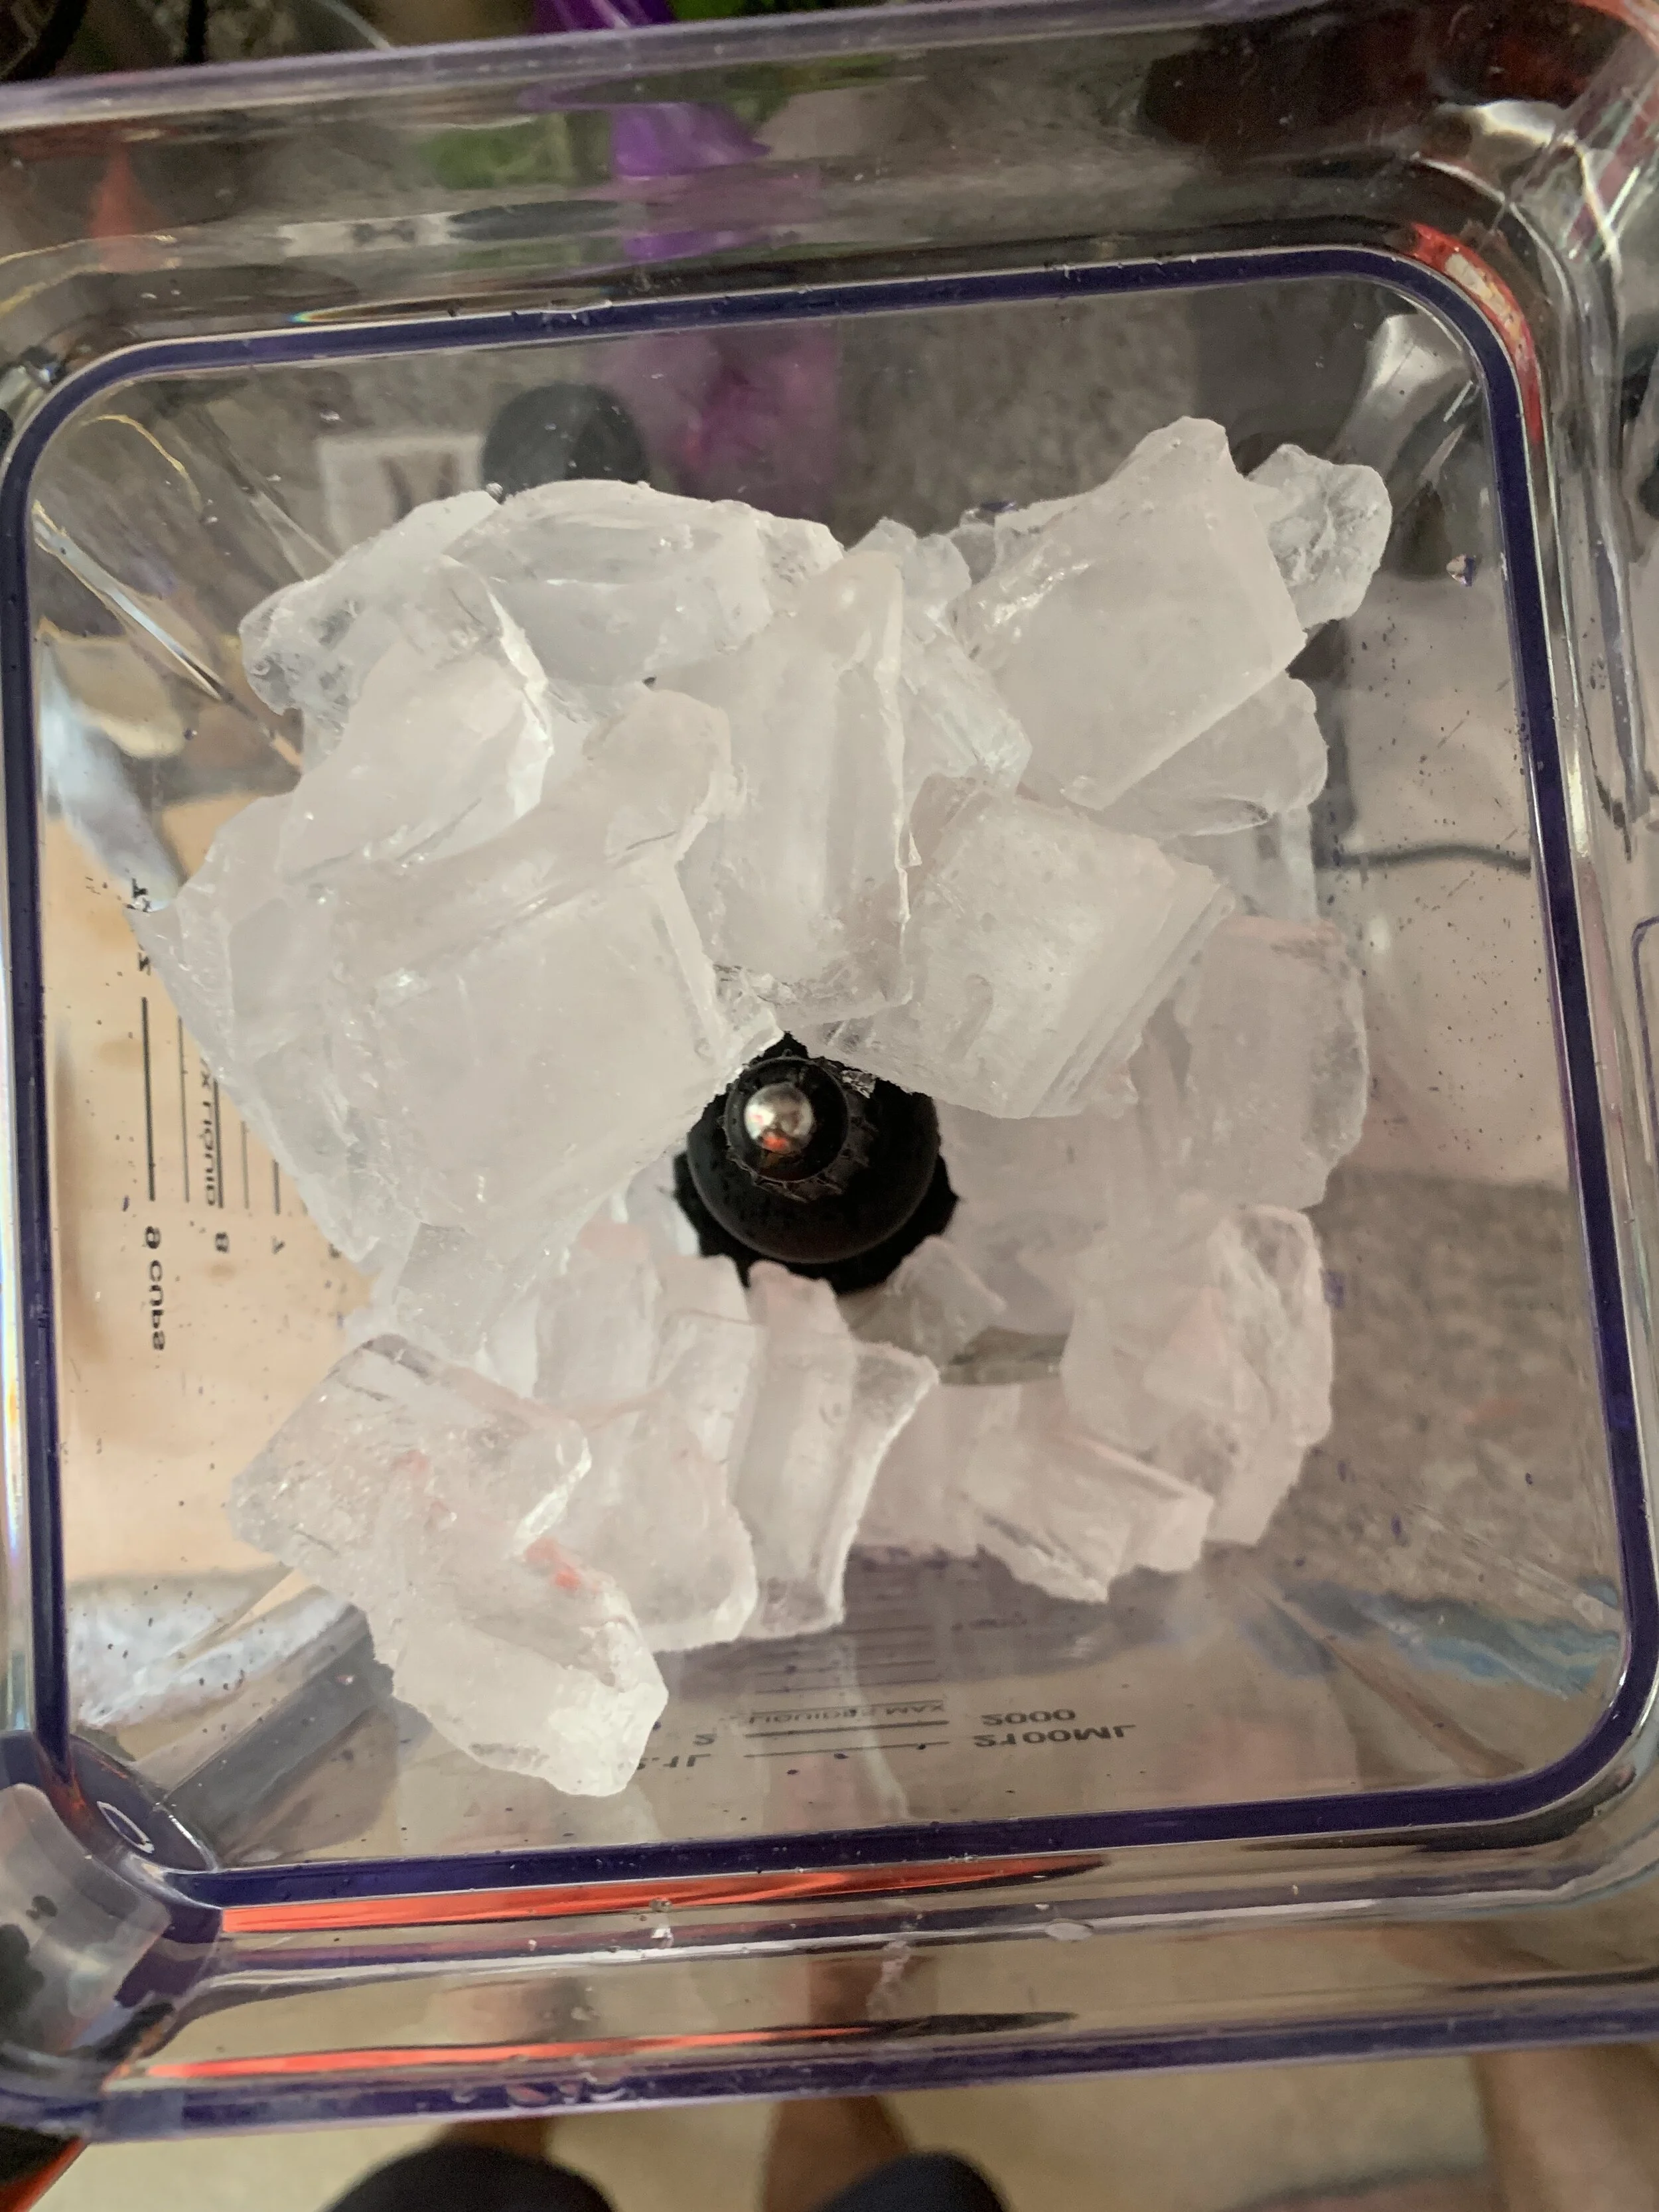

Take some uncrushed ice and start to layer on top of the piece of clothing. Cover as much you can without the ice falling off the sides. Now take your crushed ice and pack the sides to cover the entire piece of clothing, then cover any gaps on top. It will be okay of some pieces of fabric stick out. Since your piece of clothing is wet, the ice will stick to it nicely.

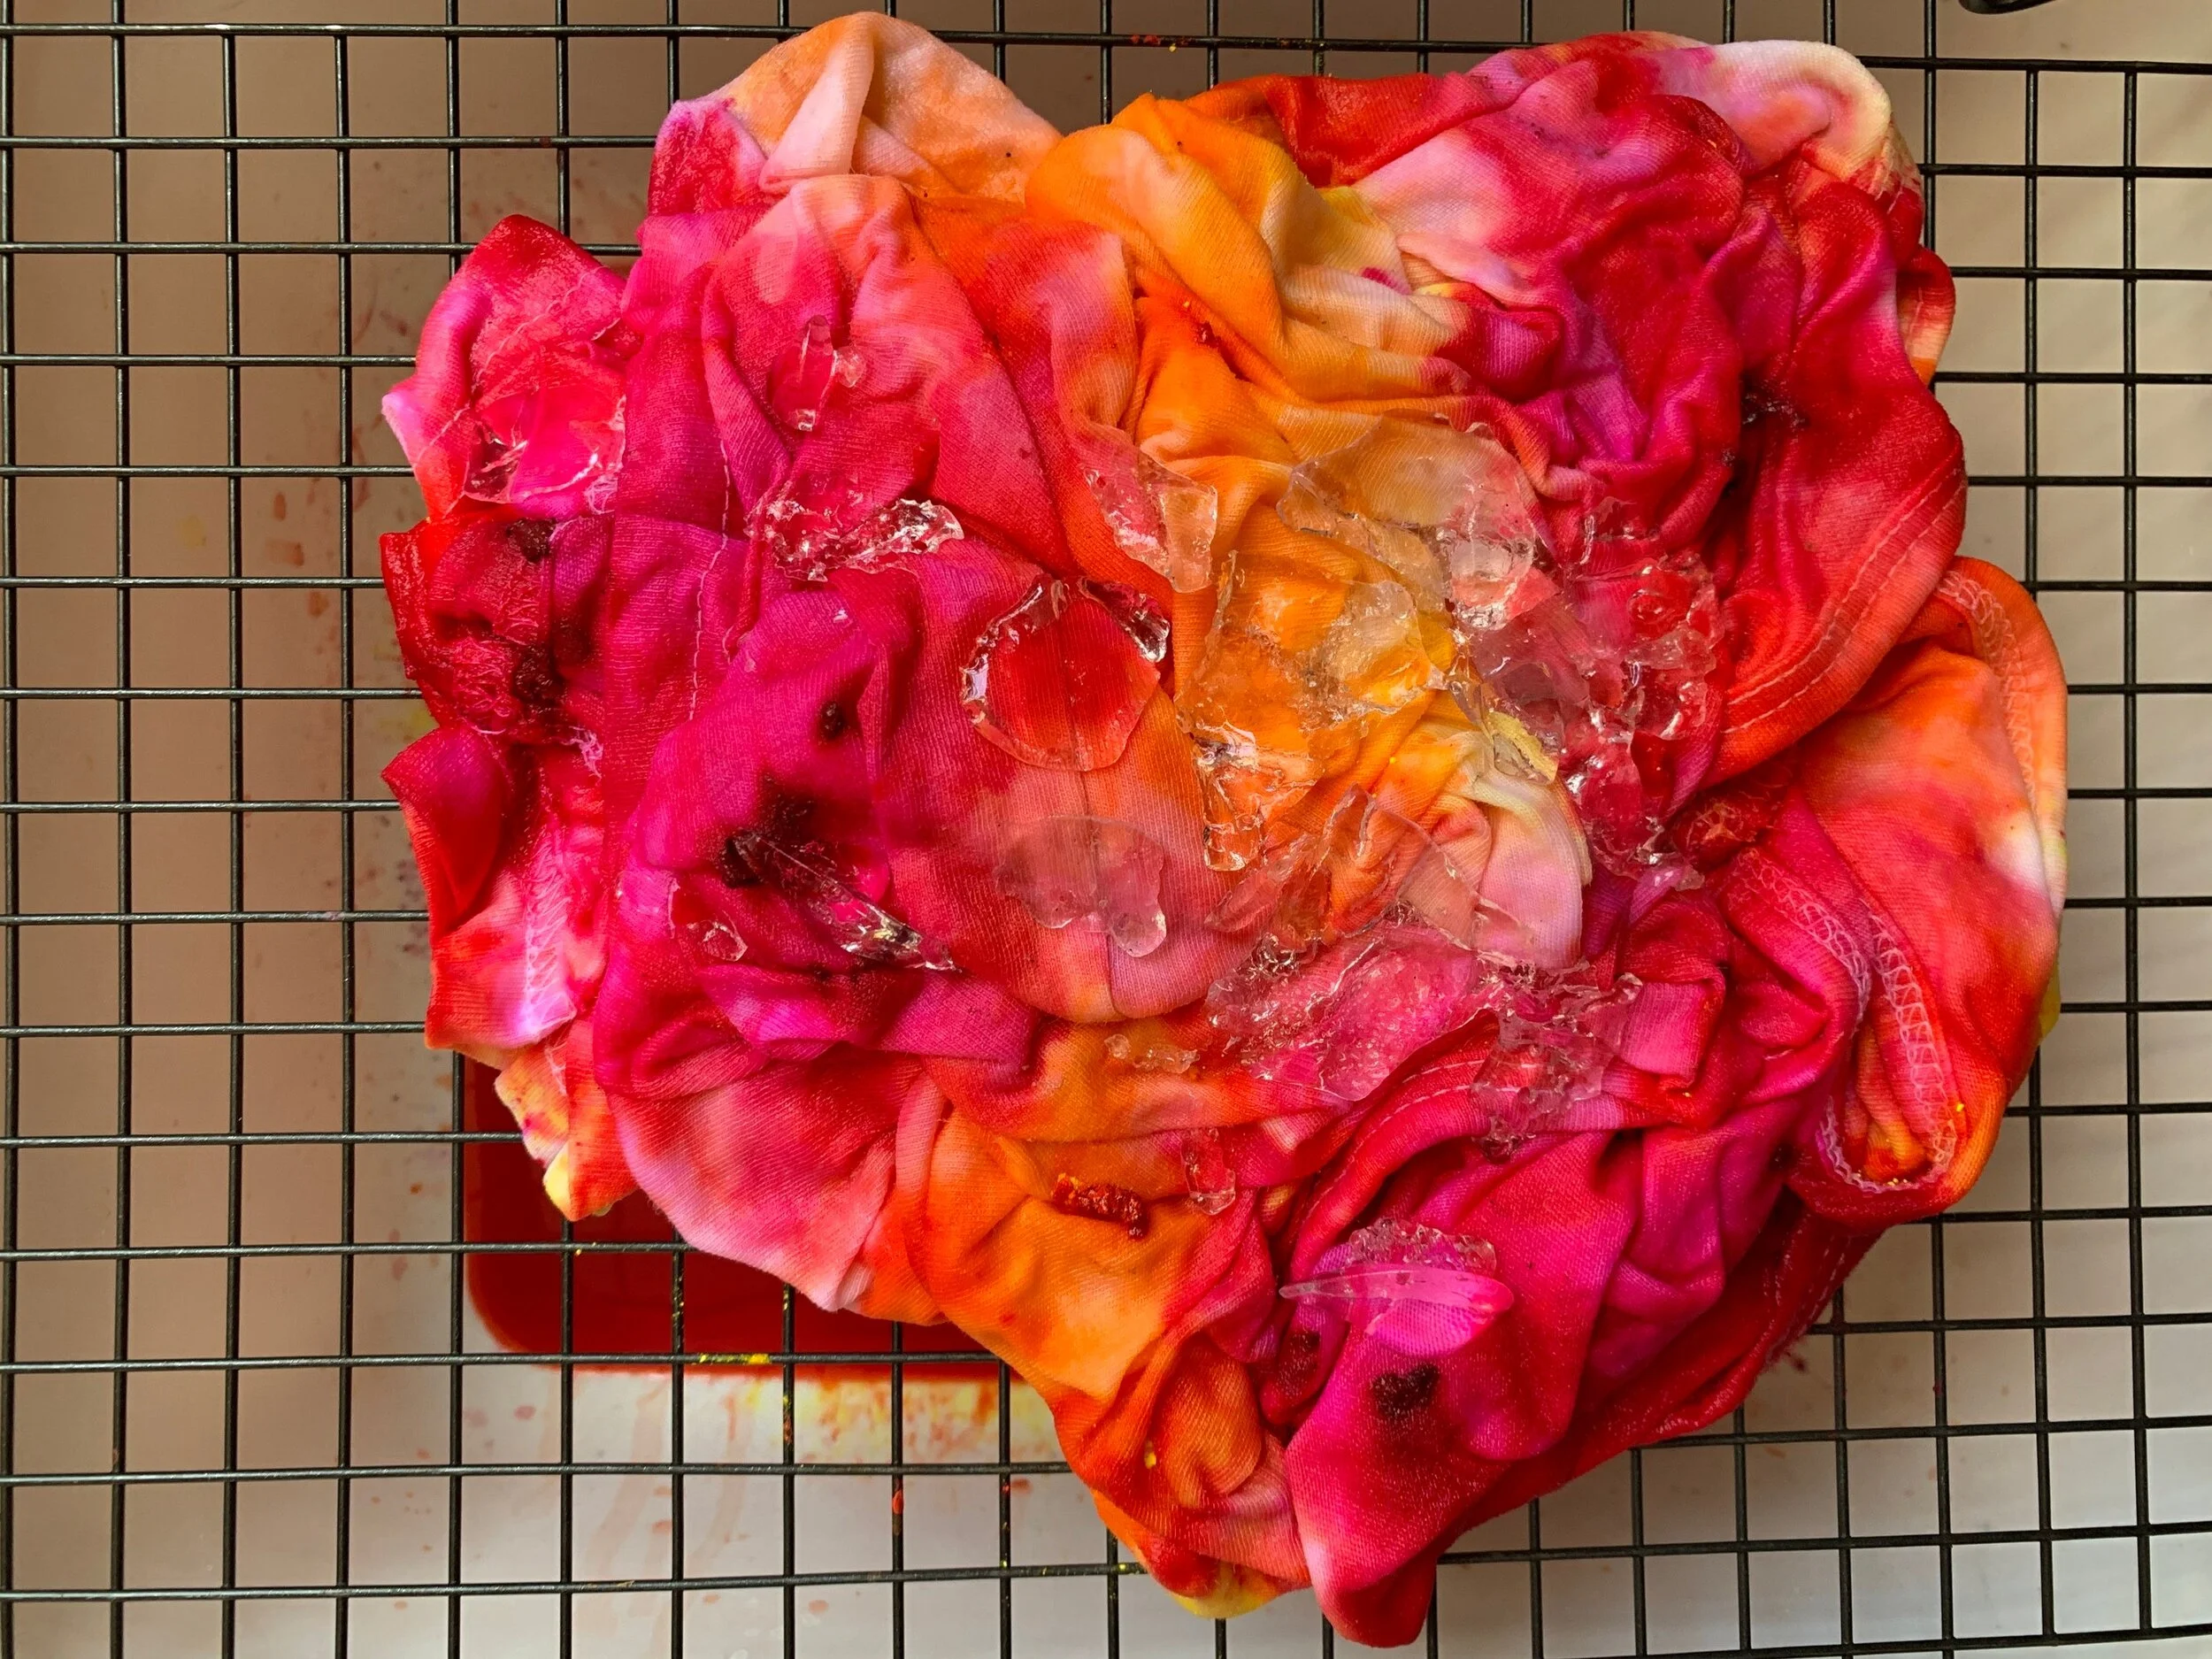
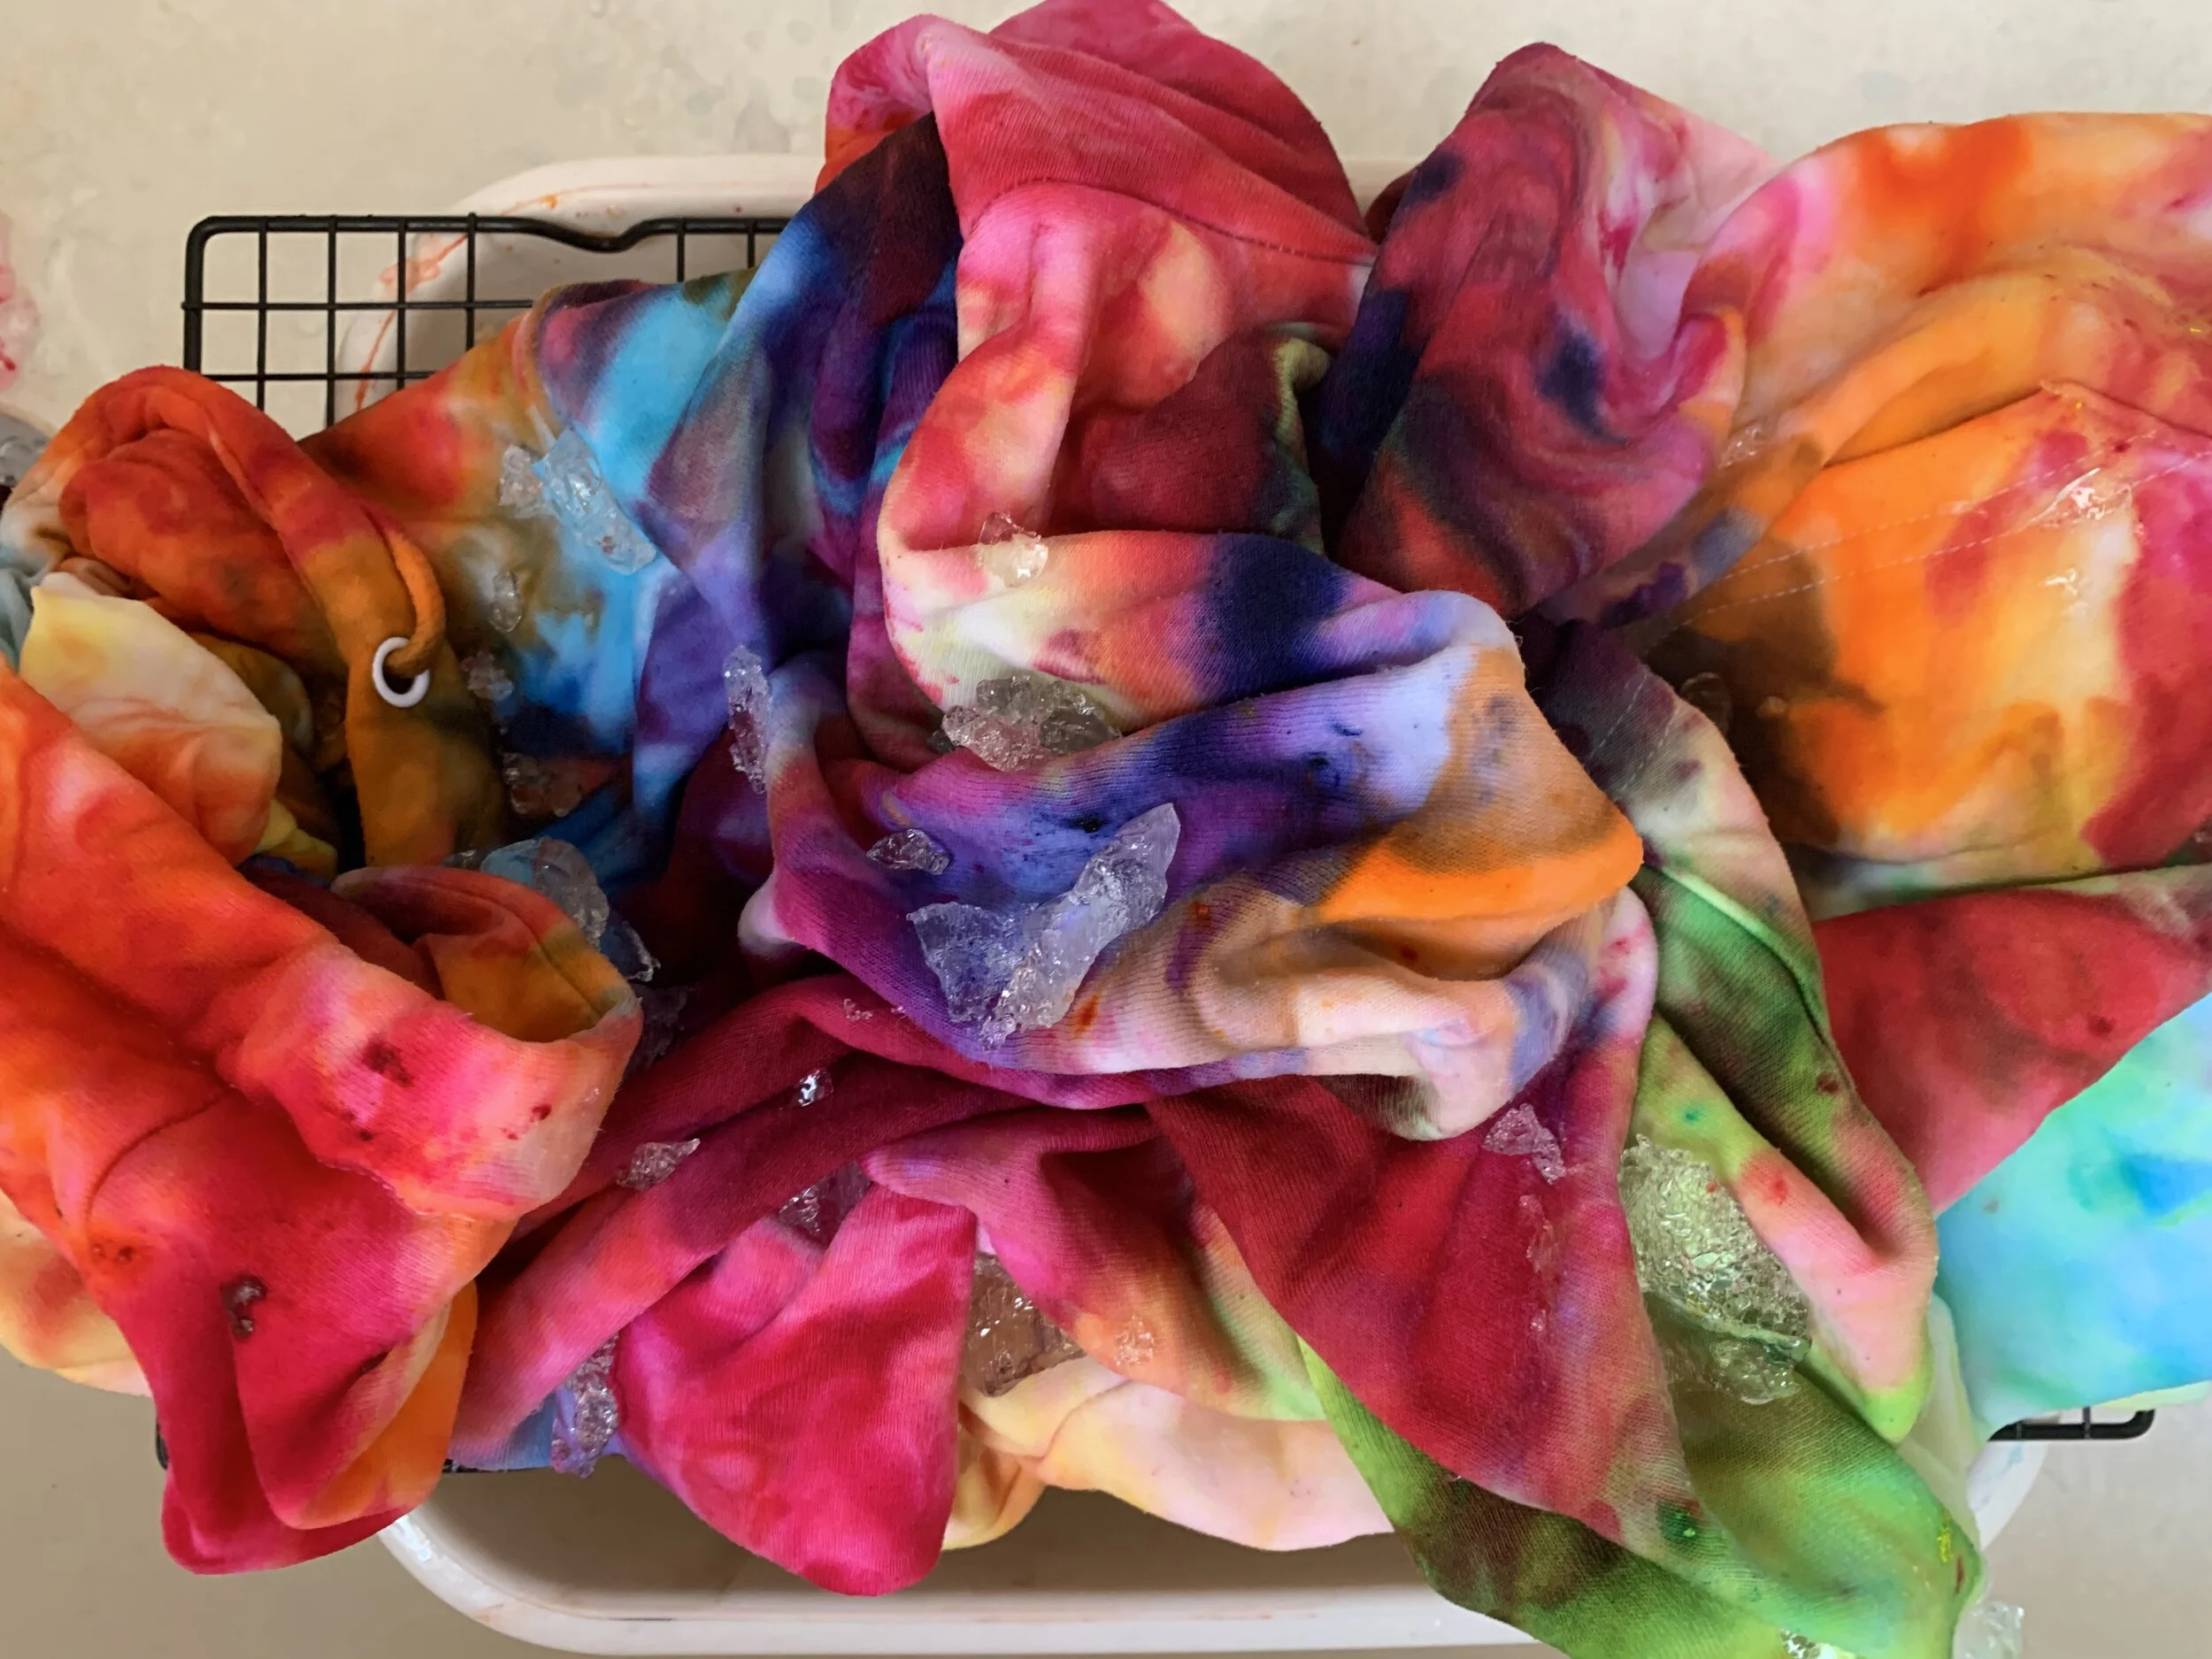
Now take some disposable spoons and sprinkle the pigments onto the ice. You’ll use way less than you think. When I did my tank top I used way more than I should have and didn’t get as many white sections as I wanted. When I did my hoodie I had some more variation because of how much fabric there was. When we did Ryan’s tank, we achieved a really cool look because we added less pigment.
Try not to overlap too many colors. You don’t want it to look too muddy. Again, no real technique here, but what I recommend is to add larger doses of pigment in different sections and then sprinkles the white space with smaller doses of pigment in other colors. I also took some lighter colors like yellow and lightly sprinkled it over deep colors like fuchsia to add some color variety.


Crush some more ice and cover the pigment. So we did a layer of ice, then pigment, then another layer of ice.
Wait a few hours and marvel at your cool new ice dyed clothing!


Once the majority of your ice is melted go ahead and carefully remove from the wire rack. Wear gloves!


Now run your item under water and wring out until the water is clear.


I hung mine dry for 1-2 days and then went to the laundromat. If you have a washer in home, just wash it after a day to let the color set. I wouldn’t wash it with any light colored clothing incase of color transfer. I washed with medium to dark clothing and my other tees were fine. The color will fade a little.
Below are images right after rinsing.


Now for an impromptu photoshoot!
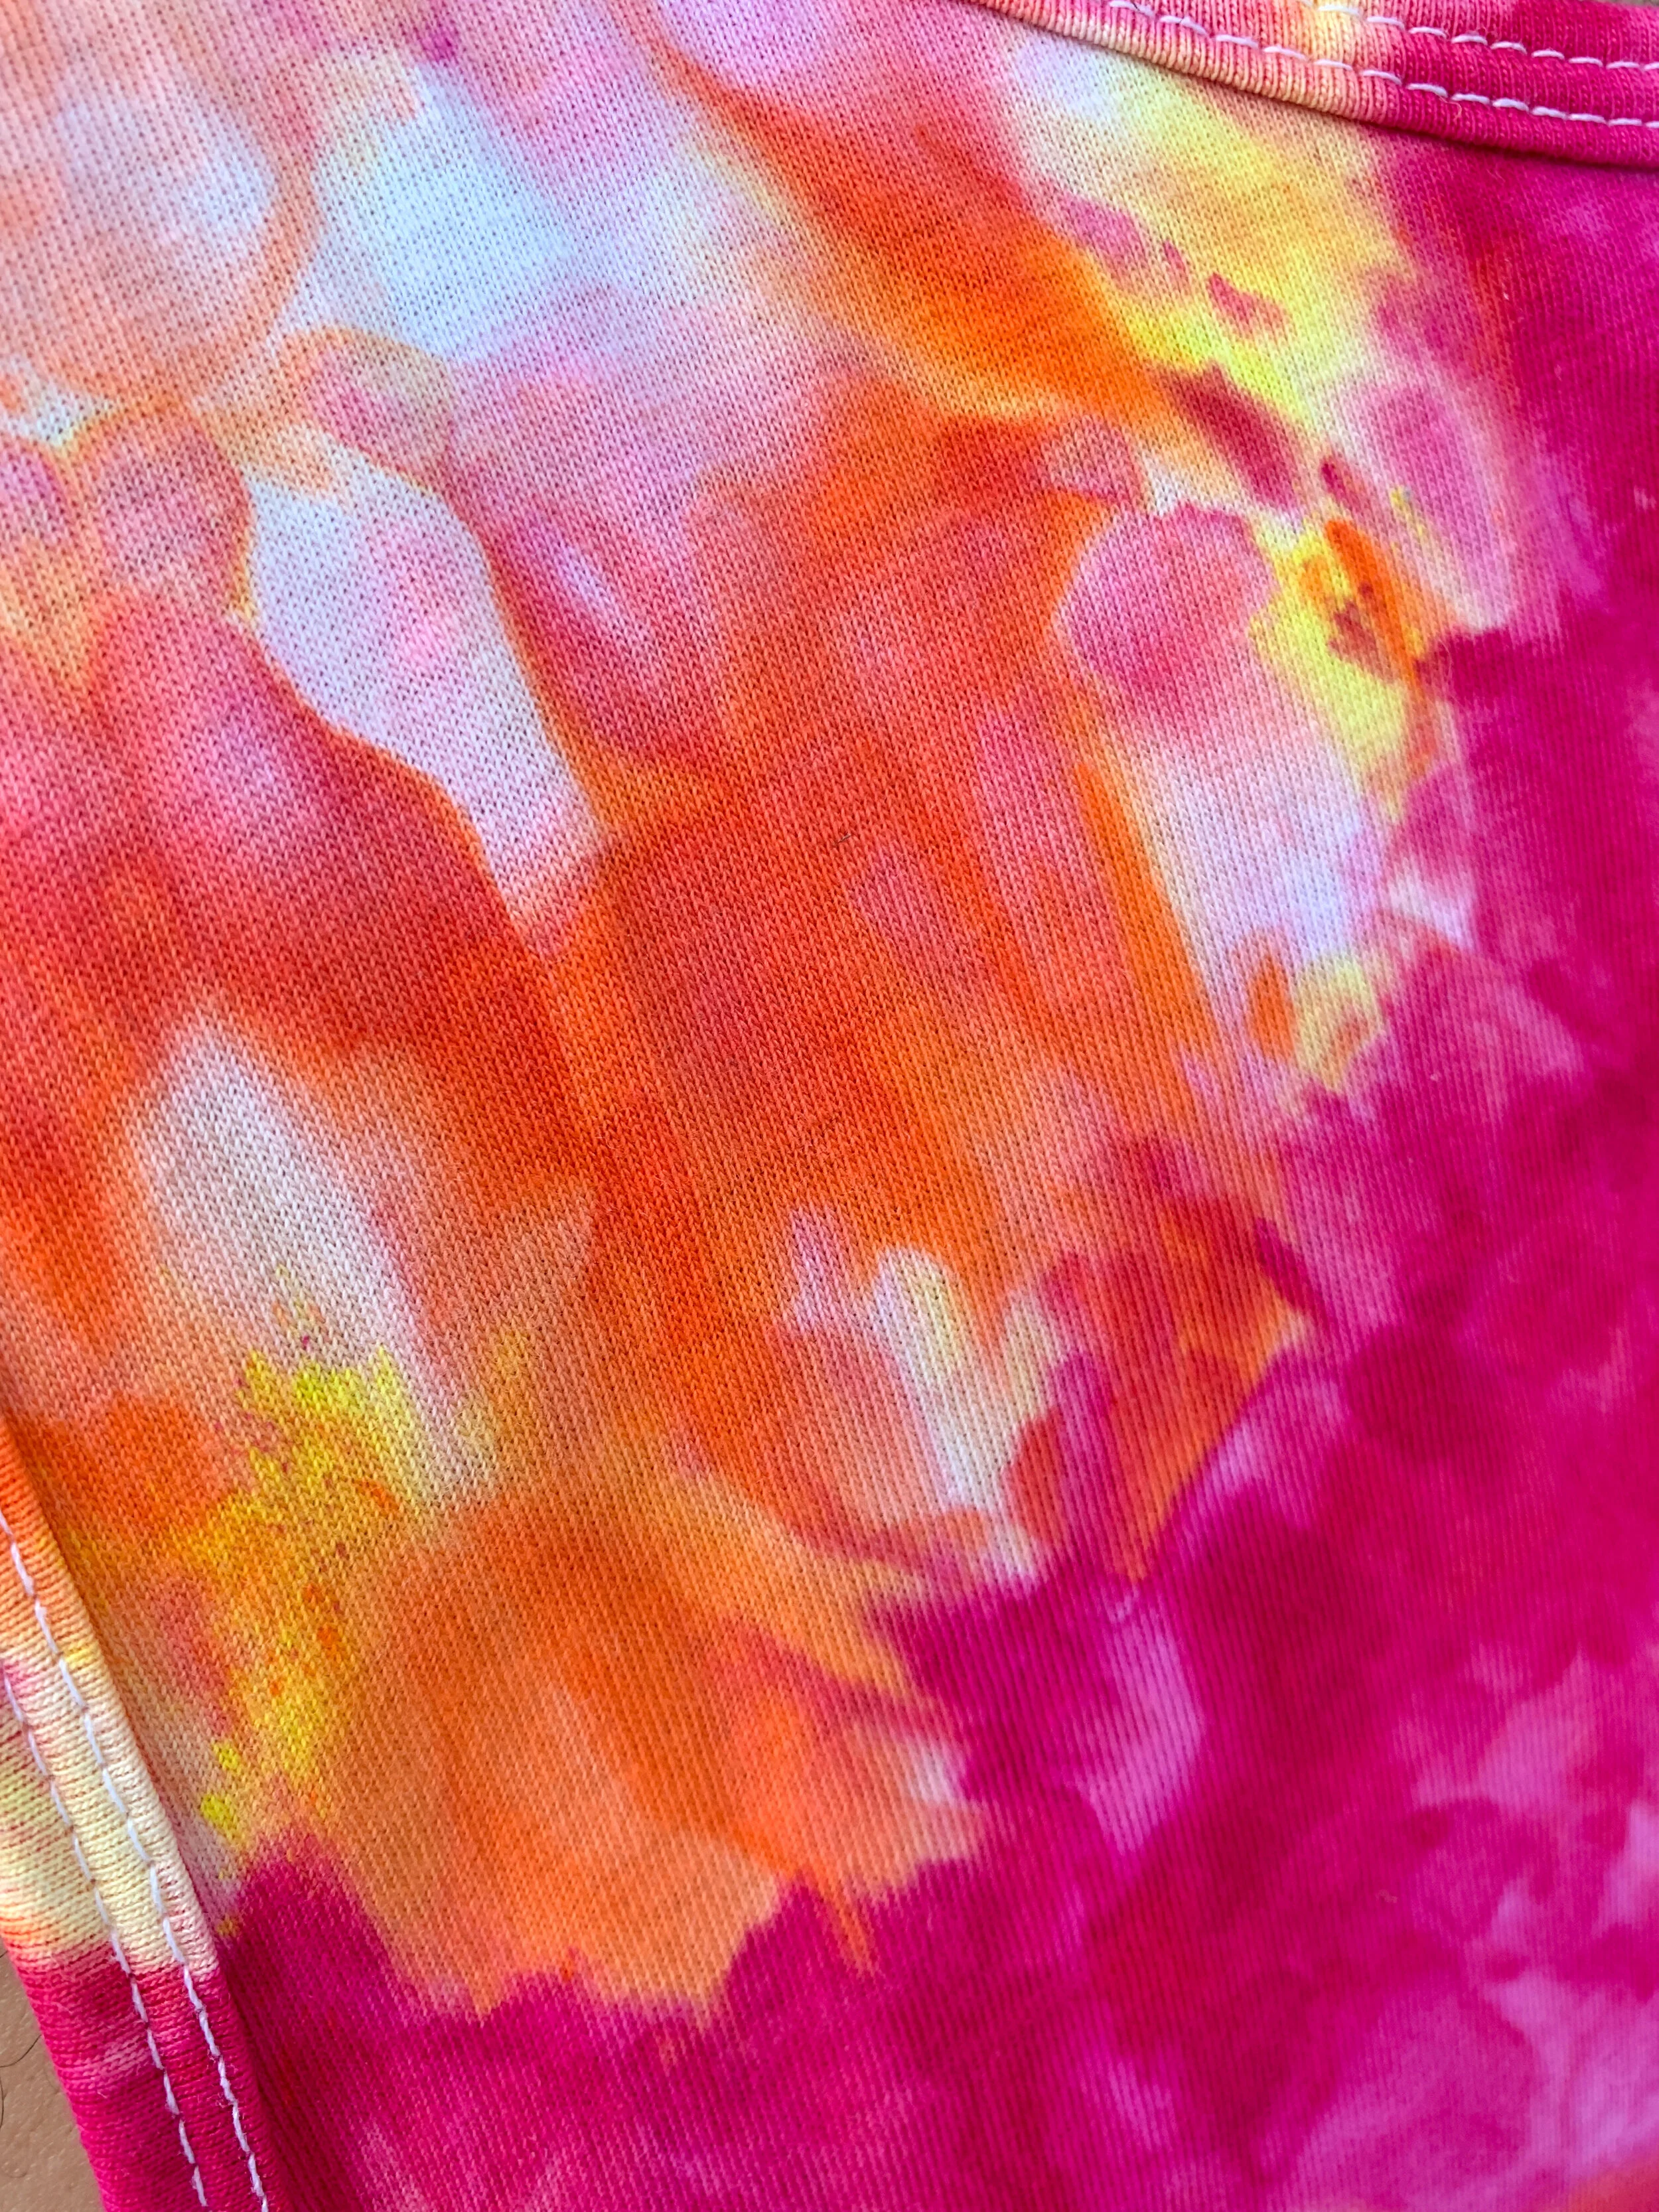
The colors become a little more pastel, but that’s the look I was trying to achieve.


This is such a fun and easy way to upcycle clothing that is sitting in the back of your closet. If you do this DIY please tag me on instagram and use #craftingwithjosue.
Xoxo
Josue